
Before getting into the main context, let’s first look at how we currently make changes to a CRM Analytics dashboard version control process. We already know how it’s done and we also know some of the problems with it.
What are we doing currently?
Method 1 : Make all the changes directly in the original CRMA dashboard and then share that updated version with the customer.
Drawbacks : Once we save the updated dashboard, the changes are visible to all users right away. That means we have to finish all the changes in one go, without shutting down the computer or losing internet connection. This can be a problem, especially when we need to make big changes, like adding a new page and including many reports. It’s just not practical every time.
Method 2 : To avoid the issues from the first method, we can clone the original CRM Analytics dashboard and make all the changes in the cloned version. Once it’s ready, we give this updated version to the clients.
Drawbacks : We’ll have to share the new dashboard link with all the clients, which can be a hassle. Then, the old dashboard needs to be either deleted or moved to a private folder. After that, the new dashboard must be moved into the shared folder. All of this adds extra work for the developer. And if the developer forgets to delete the old dashboard, it can lead to many duplicate dashboards piling up in Salesforce.
Then, what would be the best approach?
To avoid all these drawbacks, there is a simple and effective solution available right within the dashboard. Let’s take a closer look at it.
The solution is to become the Publishers of the dashboard. As Publishers, we get to choose which version is the Live version that users see, and we can change this anytime we want.
Now, let’s look at how this works in real life. Using this option, we create a new version of the dashboard and work on it while saving our progress along the way. Meanwhile, the previous version remains set as the Live version, so users only see that one, not the version we’re currently editing. When we finish all the changes, we simply switch the new version to be the Live version.
This way, users always see a stable dashboard, and we can work freely without worrying about disrupting their experience.
Let’s take a simple demo to see how this works.
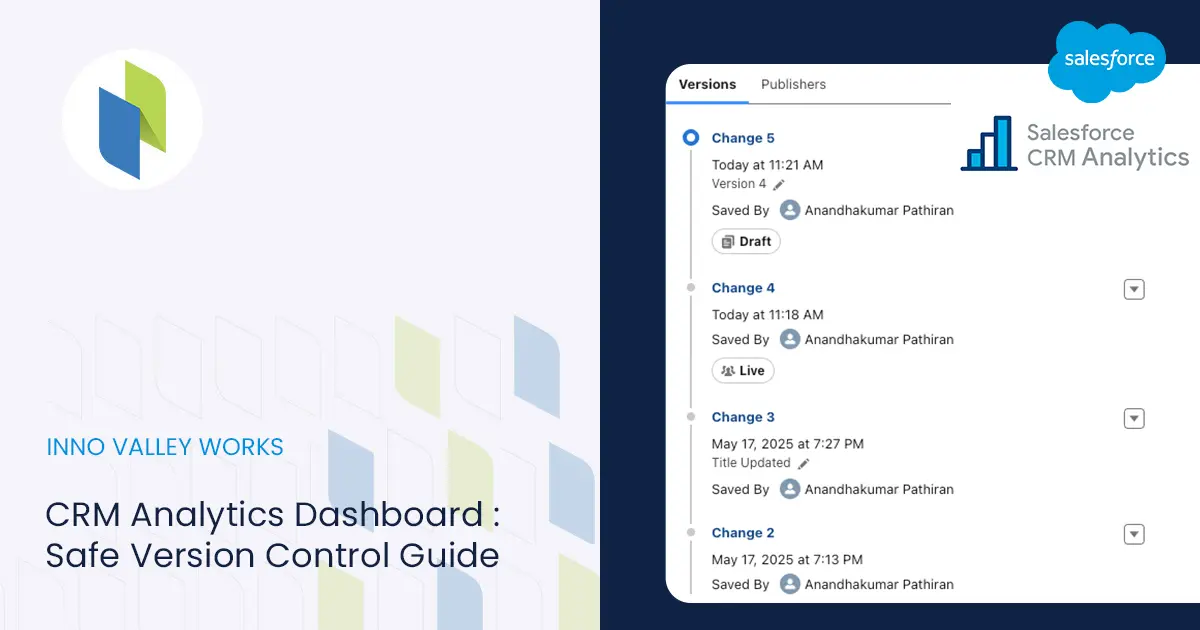
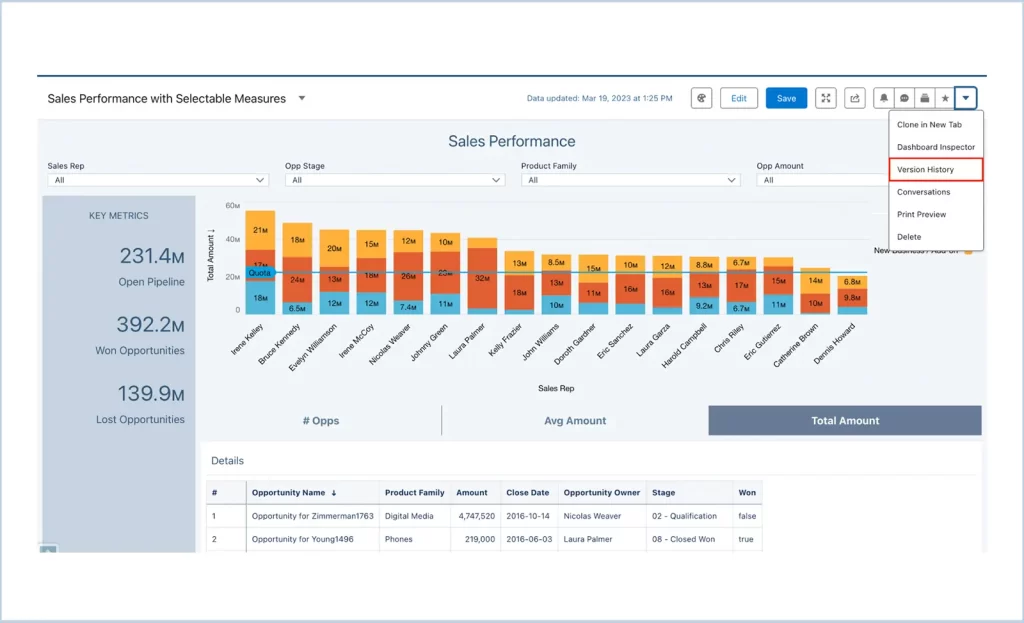
Step 1 : Go to the CRMA dashboard where we want to make changes, click the dropdown button on the right side, and select the Version History option.
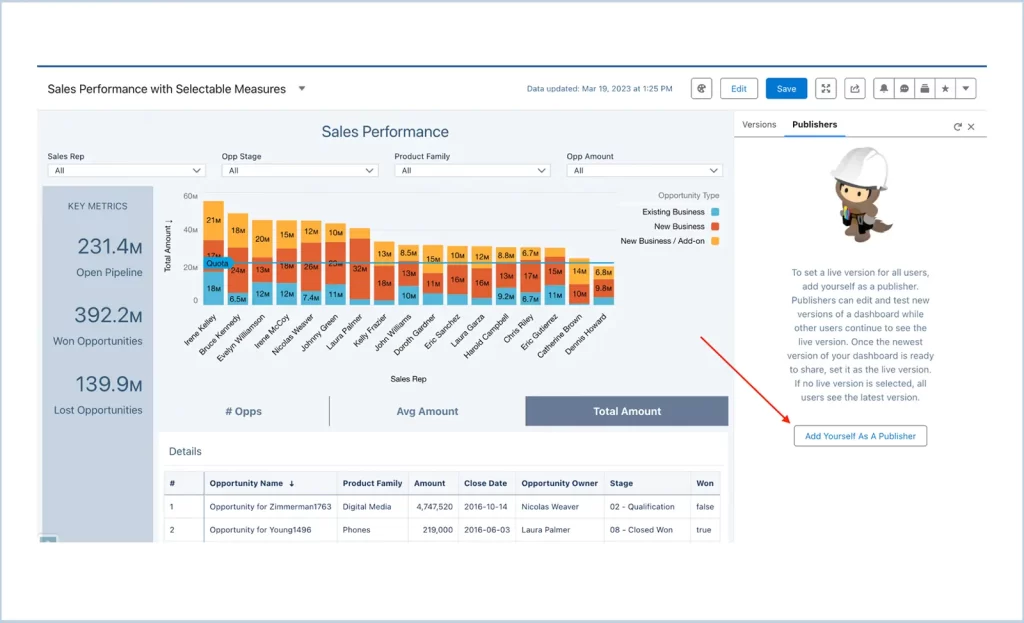
Step 2 : Click the Publishers tab and add yourself as a Publisher.
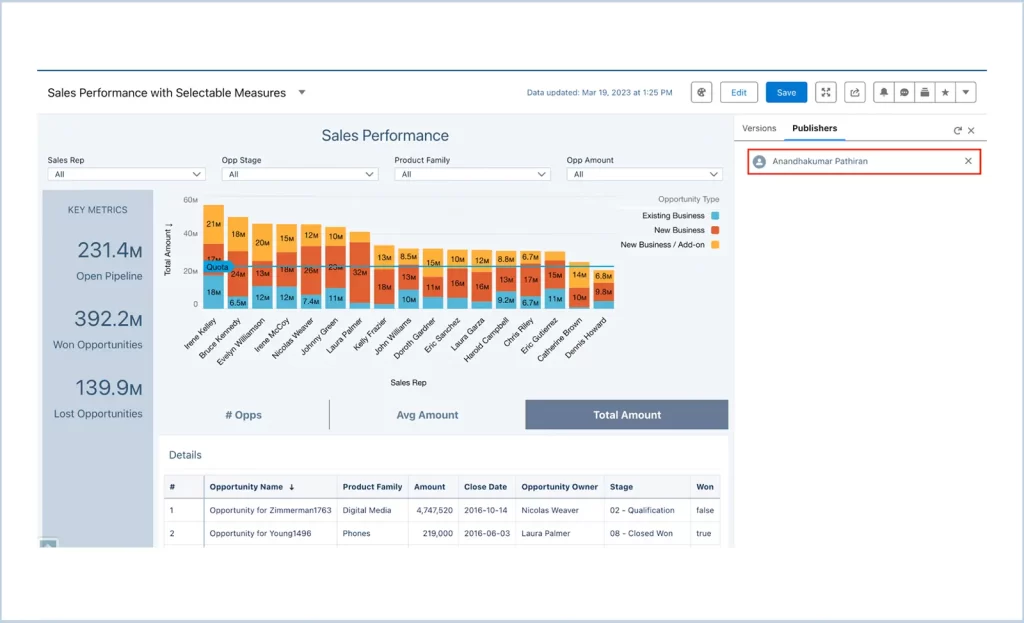
Step 3 : Once we become a Publisher of the dashboard, we will be able to see our name listed in the tab like this :
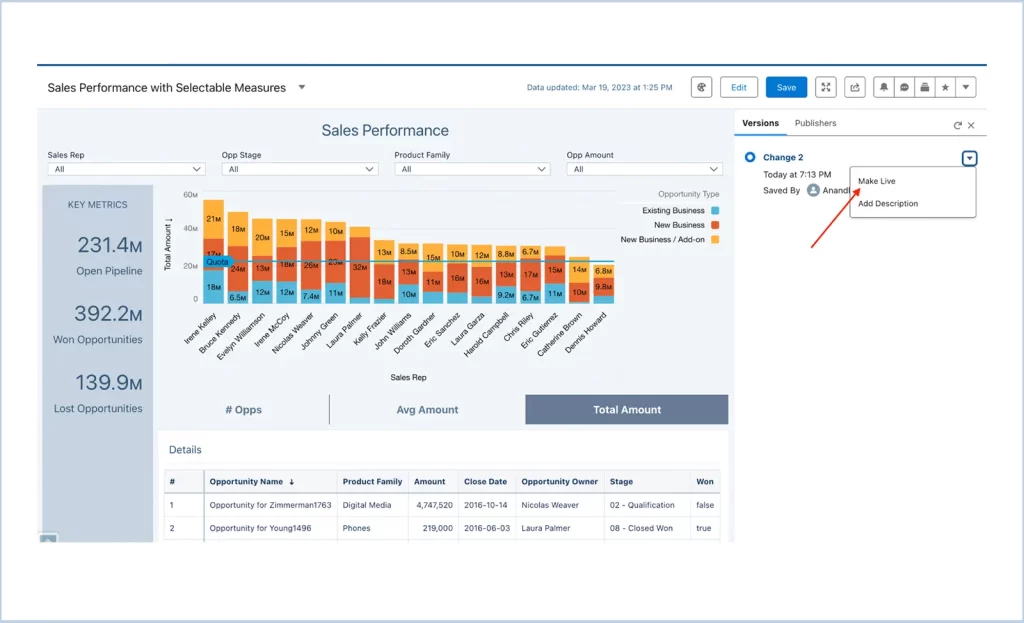
Step 4 : Navigate to the Version tab and update the current version to be the Live version. Once this is done, the “Live” label will be assigned to that version.
Step 5 : We can now update the dashboard without impacting the Live version. To begin, let’s change the dashboard’s Title, save it, and see if the changes show up for other users.
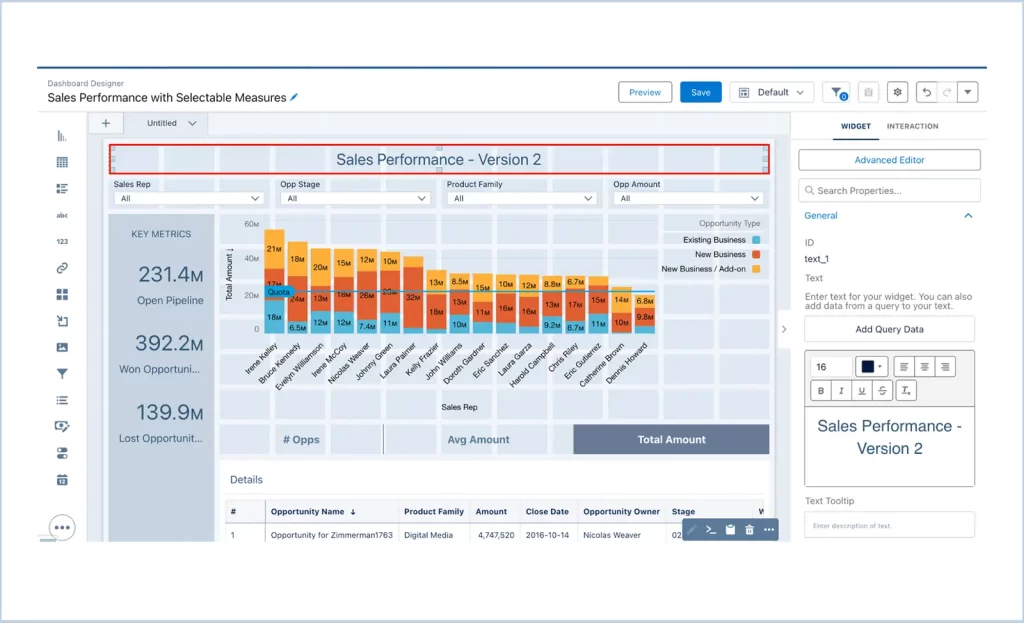
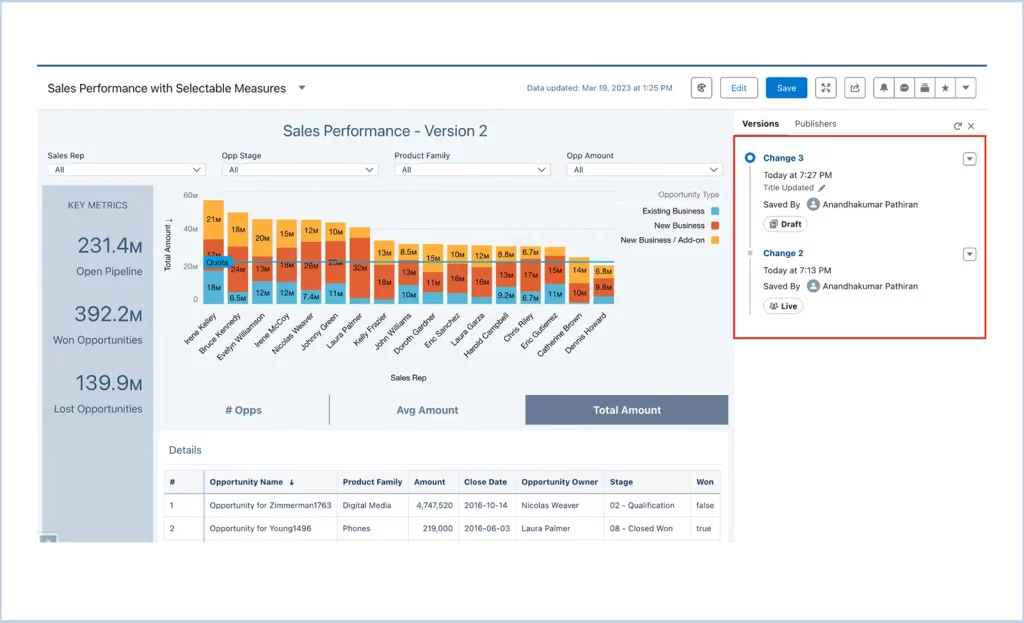
Step 6 : After saving the version, go to the Version tab and we will see that the new version is labeled as Draft.
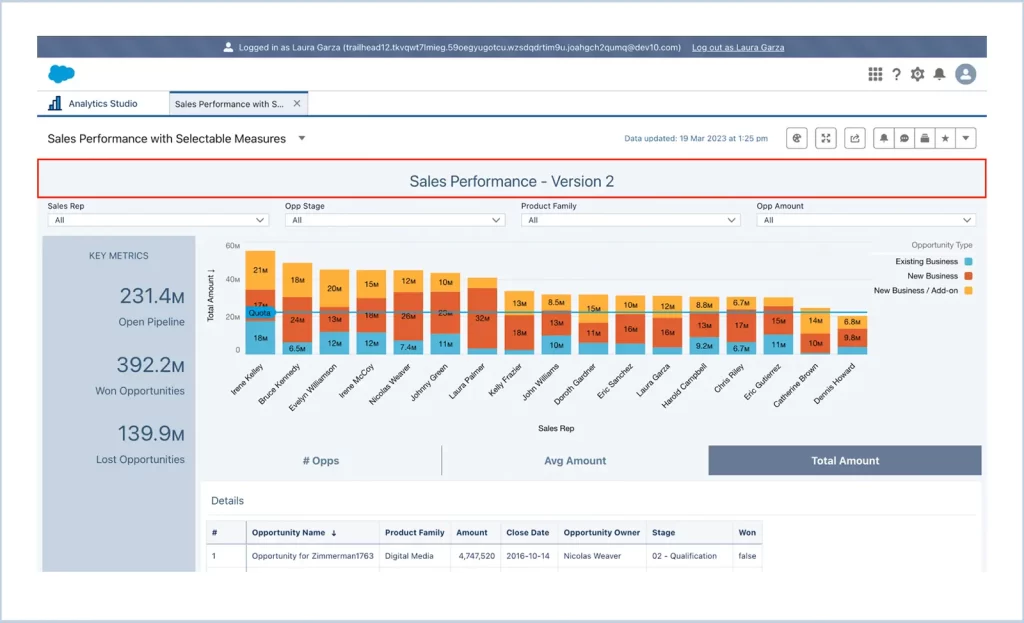
Step 7 : Log in as another user and open the dashboard. Below is a screenshot showing the dashboard as the other user sees it, which is the previous version we set as Live.

Step 7 : Once the changes are done, mark the latest version as Live. After that, the latest version will be labeled as Live.
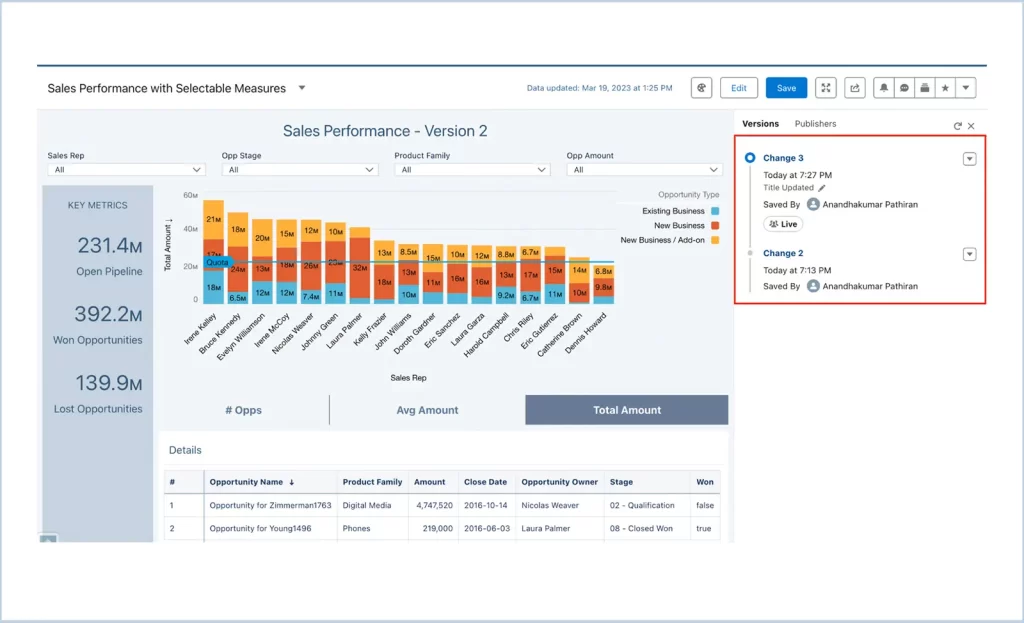
Below is what another user sees after we mark the latest version as Live. We can see that the changes are reflected.
Note : If no live version is selected, all users see the latest version.
We are Inno Valley Works, We are a passionate team of developers, best thinkers and consultants who can solve anything and everything.
With our highly engaging team, you can easily bring the vision to all your business ventures come true.
We have team, put your problem, get your solution
🎥 Check Out Our YouTube Channel
Explore helpful tutorials, product updates, and feature walkthroughs from the team at Innovalley Works.
👉 Visit Our Channel