
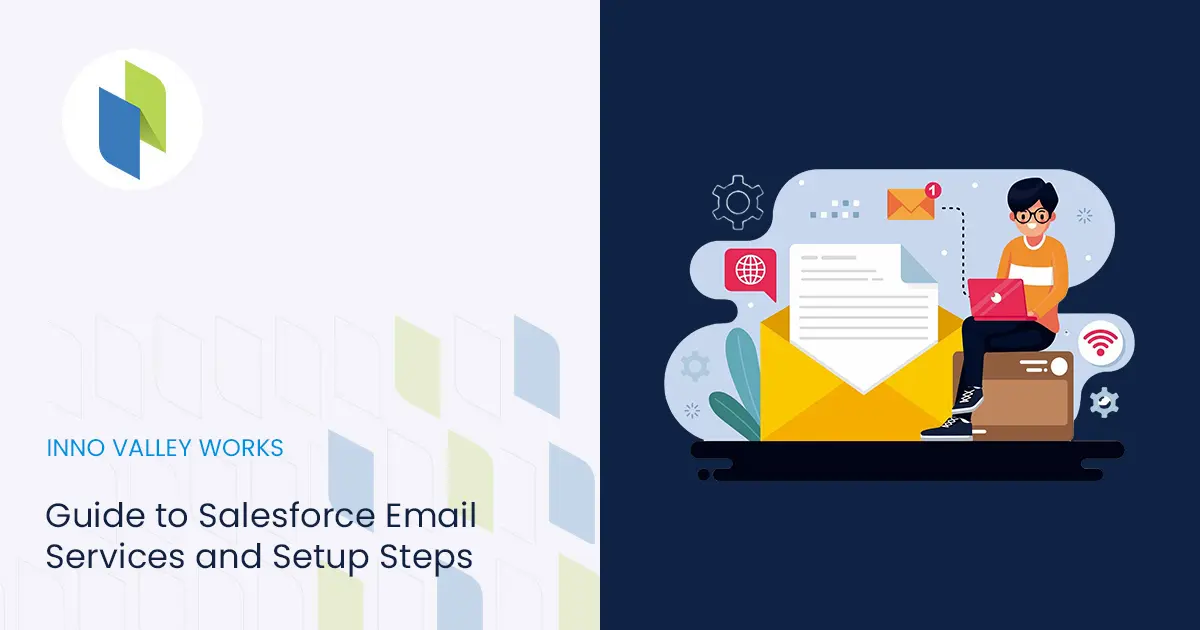
Email Services
- Email Services process incoming emails and execute all necessary actions to meet business requirements. These actions are custom and customizable within Apex classes.
- Multiple email services can be created to do multiple tasks/actions.
- It is primarily used to implement any custom functionality replicating the email-to-case functionality.
Email-to-case Vs Email Services
Email-to-case :
- Email-to-Case is a standard feature in Salesforce for processing support cases.
- Cases and attachments are automatically created when an inbound email is received through Salesforce.
- To implement custom functionality, triggers, and flows are used to meet business needs.
Email Services :
- It’s a standard feature that allows processing various items in Salesforce by handling inbound emails.
- Unlike Email-to-Case, cases and attachments aren’t automatically created when an inbound email is received in Salesforce.
- All processing must be handled through the configured Apex class.
Setup Details
Apex Class :
- The functionalities of Email Services are managed within an Apex class chosen during the creation of the Email Service.
- Create an apex class. And add the below code in there.
public without sharing class InboundEmailService implements Messaging.InboundEmailHandler {
    public Messaging.InboundEmailResult handleInboundEmail(Messaging.inboundEmail email, Messaging.InboundEnvelope env) {
        Messaging.InboundEmailResult result = new Messaging.InboundEmailResult();
        EmailMessage emailMsg = new EmailMessage(
            FromAddress = email.fromAddress,
            FromName = email.fromName,
            ToAddress = String.join(email.toAddresses, ','),
            HtmlBody = email.HtmlBody,
            TextBody = email.plainTextBody,
            Incoming = true,
            Subject = email.subject
        );
        try {
            insert emailMsg;
            // Add the Functionality here.
            result.success = true;
        }
        catch(Exception e) {
            System.debug('Error ==>'+e.getMessage());
            result.success = false;
        }
        return result;
    }
}
Note
- After the email message creation, add your functionality (Inside the try {})
- In the InboundEmailResult object, the success value indicates if the email was processed successfully.
Email Service :
- Click the Gear Icon (⚙️).
- Find ‘Email Services’ in Quick Find and select it.
- Click ‘New Email Service’.
- Enter the required information and choose the newly created Apex class.
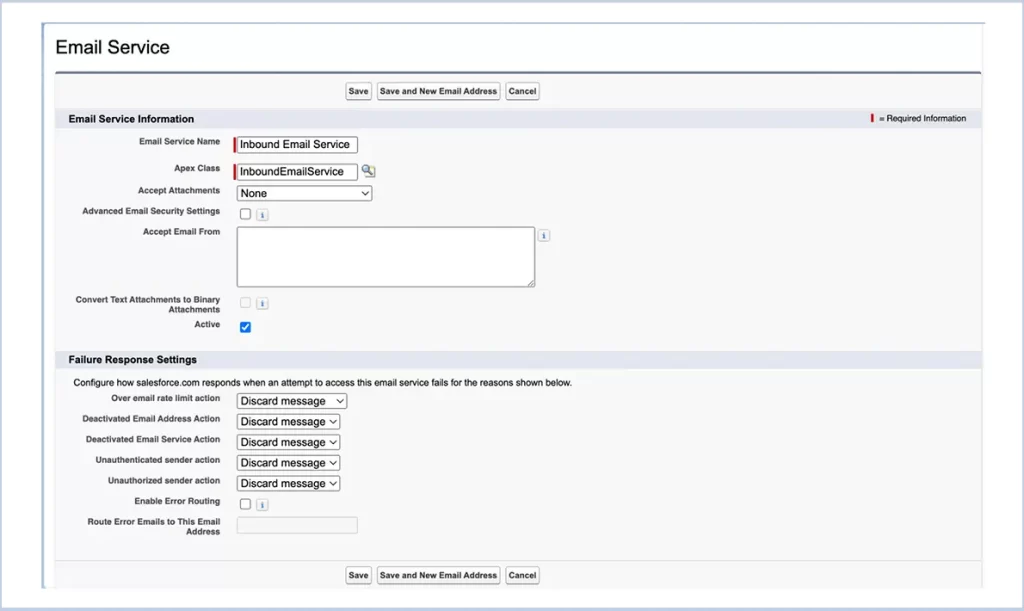
- Click ‘Save And New Email Address’.
- Enter the Email Address Name. Choose the Context User.
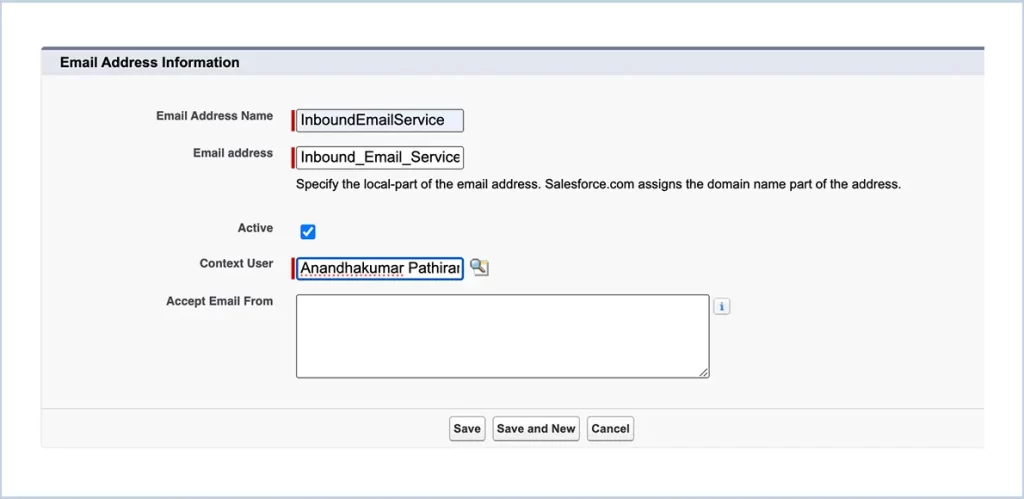
- Ensure the Active button is checked on both Email Service and Email Address.
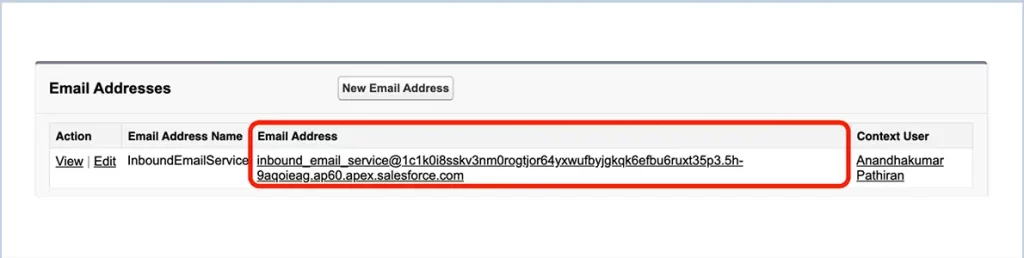
All the Email Service setup is done in Salesforce. Next, we need to configure Gmail to forward the email to the newly created routing address.
Routing Address Setup :
- Step 1: Get the newly generated email address from the Email Service.
- Step 2: Goto Gmail and find the See All Settings.
- Step 3: Click the Forwarding and POP/IMAP tab.
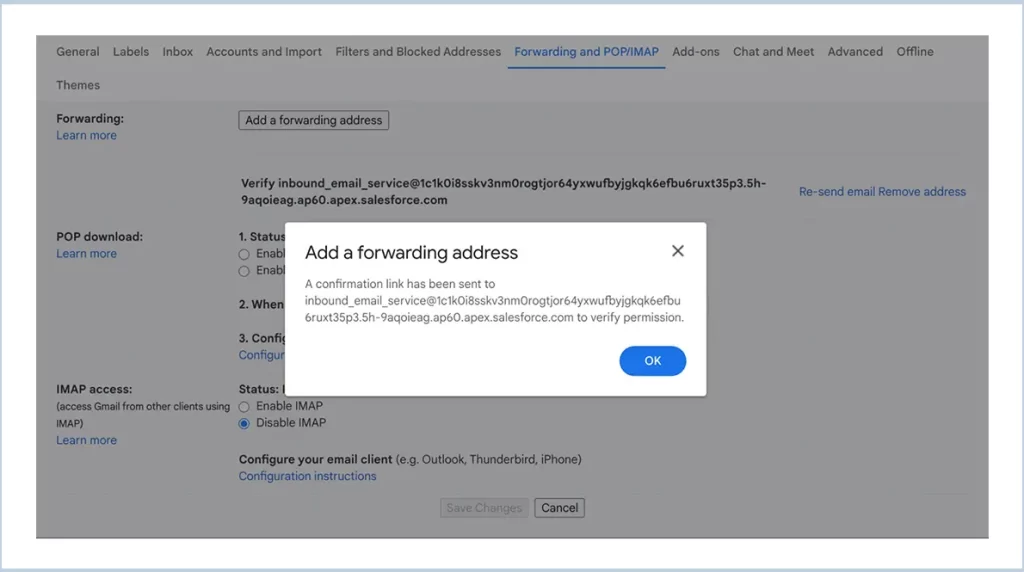
- Step 4: Click the ‘Add a forwarding address’ button and paste the routing address there.
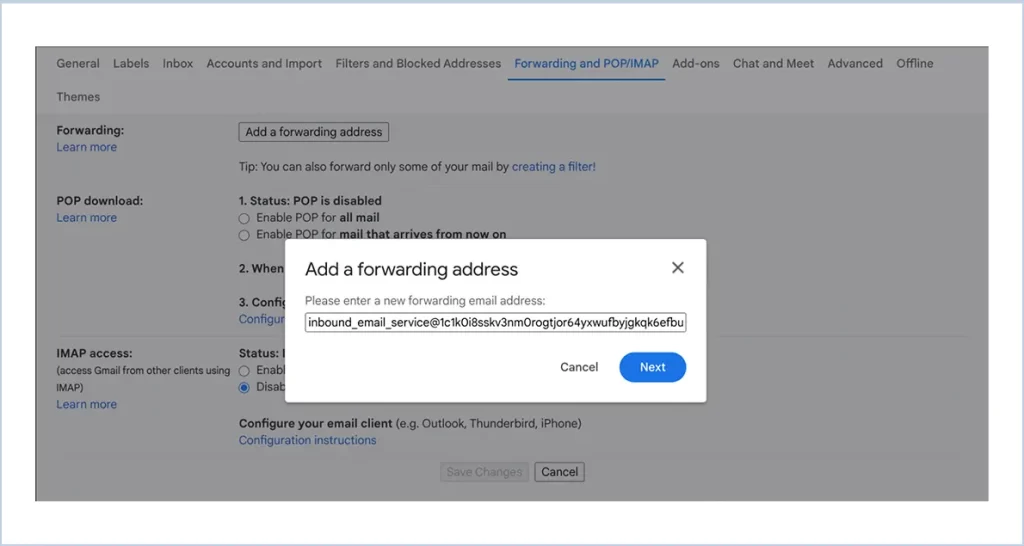
- Step 5: Click the Next button. The page will navigate to the authentication. Complete that.
- Step 6: If authentication is successful, a confirmation message will appear. Click the Proceed button. A notification will then pop up, informing you that a confirmation link has been sent to the forwarding address.
- Step 7: Now a verification email is sent to SF. Log in to Salesforce.
- Step 8: Find the email message with forwarding-noreply@google.com as the From Address.
- Step 9: In the email message, click the verification link and confirm it.
- Step 10: After confirmation, go to Gmail and refresh the page. The Forwarding option for the routing address should now be visible.
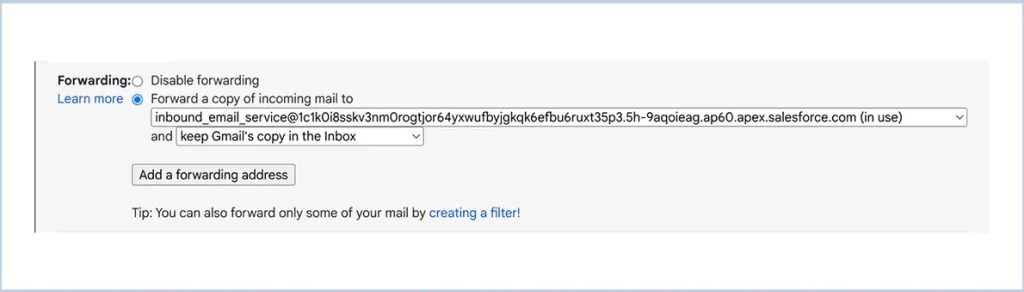
- Step 11: Now choose the option to forward the mail and save the changes.
Now, the Gmail routing setup is complete. Send an email to the address where the routing is configured. From now on, Salesforce will receive inbound messages from this inbox by forwarding the mail.
Business Use Cases
- Create standard or custom objects and customize all functionalities in an Apex class.
- Add as many restriction rules as needed to avoid unwanted or spam emails from unknown sources.
- There is no need to create attachments if only the email content is needed, as this will help conserve the production org’s space.
- Configure multiple email services to process various individual business requirements.
Resources
- Salesforce Documentation: Email Services
Apex Developer Guide: InboundEmail Object
We are Inno Valley Works, We are a passionate team of developers, best thinkers and consultants who can solve anything and everything.
With our highly engaging team, you can easily bring the vision to all your business ventures come true.
We have team, put your problem, get your solution
🎥 Check Out Our YouTube Channel
Explore helpful tutorials, product updates, and feature walkthroughs from the team at Innovalley Works.
👉 Visit Our Channel