
Create a Managed Package – Only one package can be managed for an org, and we can create multiple unmanaged packages. This guide explains the process of Managed Package Creation and Deployment in Salesforce, helping you understand how to structure, add components, and deploy it efficiently.
- From Setup, enter Package in the Quick Find box and select Packaging -> Package Manager.
- Click New under Packages
- Enter a Name for your package and Namespace matching the name which would be added as prefix to all components in the package and name of the package would be the name of the final package in App Exchange.
- On the right side of the screen, select the Managed checkbox.
- Click Save.
- Click Add to add the components.
- From the drop-down list, choose the type of component like we do on creating change set.
- Select the components you want to add – Preferably add all lightning components, apex classes and all code related aspects first as this would in turn pull all the objects, fields, static resources and custom setting associated with it. Mostly the missed items would be Remote Site settings, few custom fields and buttons and page layouts.
Note: Do not add any components that are not relevant to your features as this would affect the installation of this package to another org. - Click Add To Package.
- Repeat these steps until you have added all the components you want in your package.
- Optionally, click View Dependencies and review a list of components that rely on other components, permissions, or preferences within the package
- Click Done to return to the Package detail page
Upload a Managed Package:
- On the Package detail page, Click Upload.
Note: For successfully uploading the package, the test classes should be covered properly on an average of 75% for all classes and user selected fields if has any dependency should be checked as this might cause error during installation to another org. - On the Upload Package page, do the following:
- Enter a Version Name, such as Spring 12. The version name is the marketing name for a specific release of a package and allows you to create a more descriptive title for the version than just a number.
- Enter a Version Number, such as 1.0
- Select a Release Type of Managed – Released (If deploying to Live) or Managed – Beta (If deploying to Sandbox) for testing.
- Change the Description, if necessary.
- Optionally, specify a link to post install instructions for the package. Click URL or Visualforce page and enter the details in the text field that appears. This link will be displayed on the Package Details page after installation.
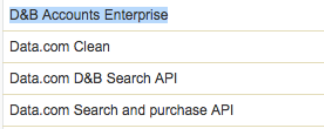
- Always uncheck the below fields as this would throw error like Missing Organisation Feature: DandBEnterprise and also make sure to not include any Data.com fields into the package as this would leave similar error.
Deploying the managed package:
- Once the package is successfully uploaded, the installation URL will be displayed on the screen
- Hit the link on the browser (change the domain to test.salesforce.com if its login.salesforce.com as per the credentials you are going to use)
- Install as Admin, Accept the terms checkbox and click Install
- If the package contains a remote site setting, you must approve access to websites outside of Salesforce. After you verify that the websites are safe, select Yes, grant access to these third-party websites and click Continue, or click Cancel to cancel the installation of the package.
- Once the package is installed, wait for few minutes to let it complete any post installation scripts running in the background. You can find the Installed Package under Installed Packages of Packaging in Quick Find Box in Settings.
We are Inno Valley Works , We are a passionate team of developers, best thinkers and consultants who can solve anything and everything.
With our highly engaging team, you can easily bring the vision to all your business ventures come true.
We have team, put your problem, get your solution