
Introduction
In today’s world of integrations, Named Credentials in Salesforce play a vital role in securely connecting with external systems — whether it’s a payment gateway, ERP system, or an external API service. To make these connections secure, Salesforce needs two things: an endpoint URL (the base URL of the external service) and some form of authentication credentials (API key, OAuth token, username/password, etc.).
Developers sometimes hardcode these values directly into Apex classes. While this works, it’s far from ideal. That’s why Salesforce provides Named Credentials — a secure, configurable, and best-practice approach for external integrations.
What are Named Credentials in Salesforce?
A Named Credential is a declarative feature in Salesforce that :
- Stores the endpoint URL (base URL of the external system)
- Stores the authentication information (username, password, bearer token, certificate, etc.)
- Provides a pre-configured, secure reference to use in your Apex code
Instead of embedding these sensitive details in code, developers just reference the Named Credential. Salesforce handles the rest.
Why Should We Use Named Credentials?
Here’s why Named Credentials should be your go-to solution for external integrations in Salesforce :
Security Best Practice
- Credentials are never hardcoded in Apex, reducing the risk of accidental exposure in version control, logs, or error messages.
- Secrets are encrypted and safely stored in Salesforce.
Simplified Management
- Endpoint URLs and credentials can change over time (sandbox vs production, vendor changes, etc.). With Named Credentials, you can update them in one place — no code changes required.
- Credentials can be changed without redeploying code.
Simplified Authentication Handling
- Salesforce handles automatic token refresh for OAuth and other flows.
- No need to manually manage headers or refresh logic in Apex.
Works with Callouts
- Named Credentials integrate seamlessly with Apex HTTP callouts.
- Your code must only reference the Named Credential name, not the actual URL or authentication details.
Audit & Compliance Friendly
- External systems and credentials are tracked and managed in Salesforce Setup.
- This provides clear visibility for admins and auditors.
Real-Life Example : Using Named Credentials with a Weather API Integration
Imagine the Salesforce org managing events, service appointments, or outdoor activities. To enhance the user experience, there is a need to fetch live weather data (temperature, humidity, conditions) for the location where these events are happening.
The external service you chose is a Weather API, which requires :
- A base URL (e.g, https://api.weatherapi.com)
- An API key for authentication (passed as a bearer token or query parameter)
Instead of hardcoding the URL and API key directly into your Apex class, use a Named Credential to manage these securely.
Named Credential Setup
Create the Named Credential
- Navigate to Setup > Named Credentials.
In Setup, navigate to the External Credentials tab. Click the New button to create a new External Credential.
- Set the Label and Name to Weather API Credentials.
- For the Authentication Protocol, select Custom.
- Save the External Credential.

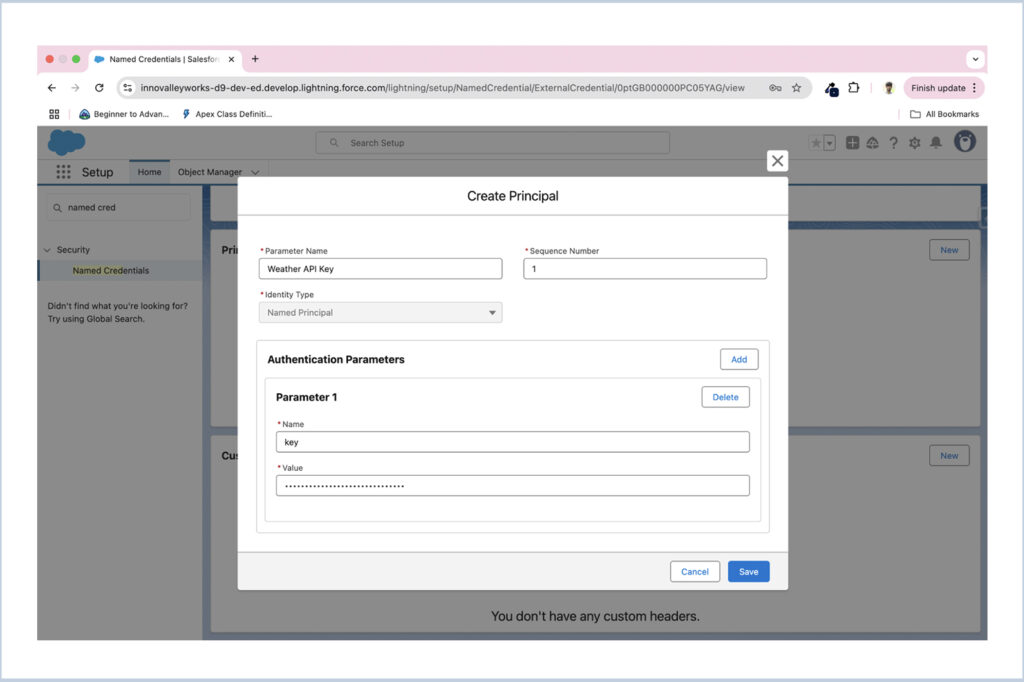
Once created, go to the Principals tab within the External Credential.
- Click the New button to create a new Principal.
- For Parameter Name, enter Weather API Key.
- Add a Parameter Name of key and set the Value to the secret key provided by your Weather API provider.
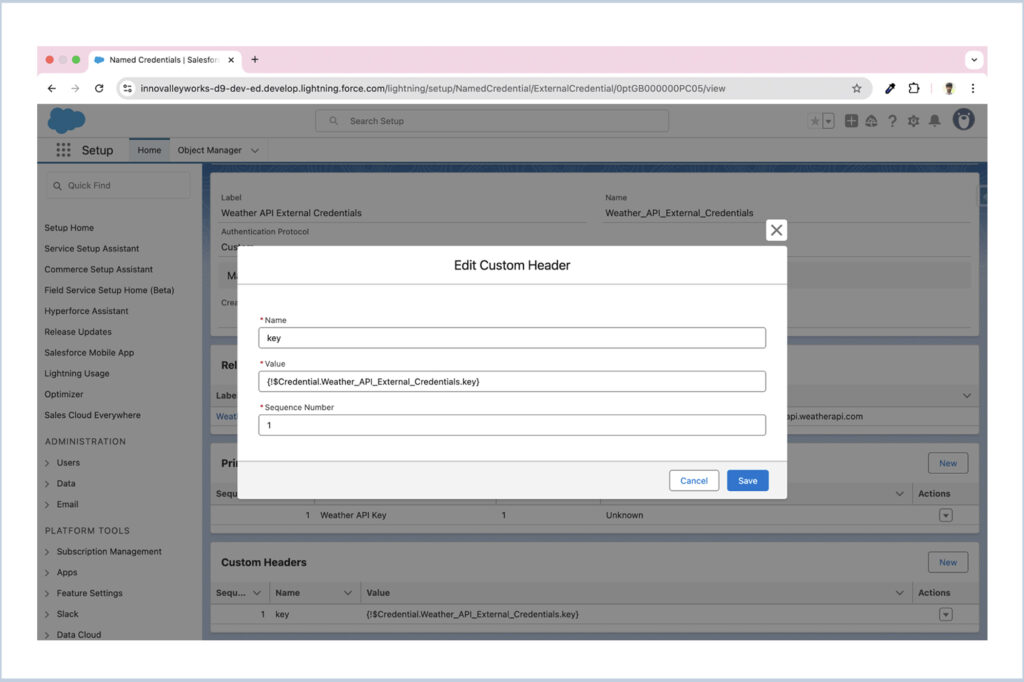
After creating the principal, you can define a custom header and directly inject the header key into the endpoint’s header, referencing the previously created named principal.
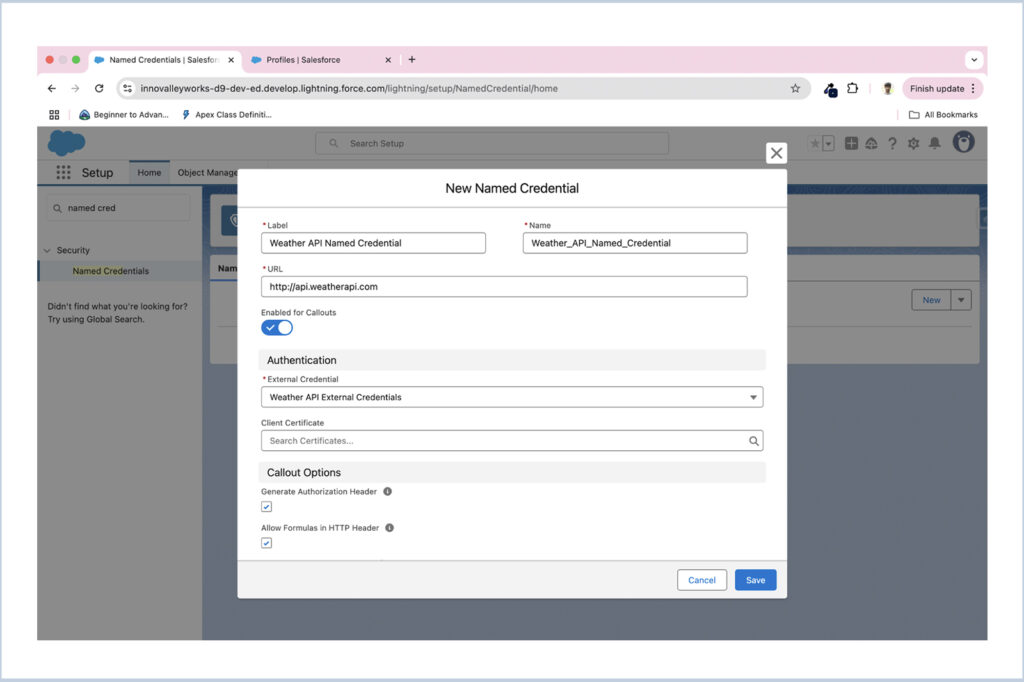
Next, navigate back to the Named Credentials tab and click New to create a new Named Credential.
- Set the Name to Weather API Named Credential.
- In the URL field, enter the base URL of the Weather API endpoint.
- Toggle Enabled for Callout to ensure it can be used in Apex callouts.
- In the External Credential field, select the External Credential you created earlier.
- Check the Generate Authorization Header and Allow Formulas in HTTP Header option.
- Click Save.
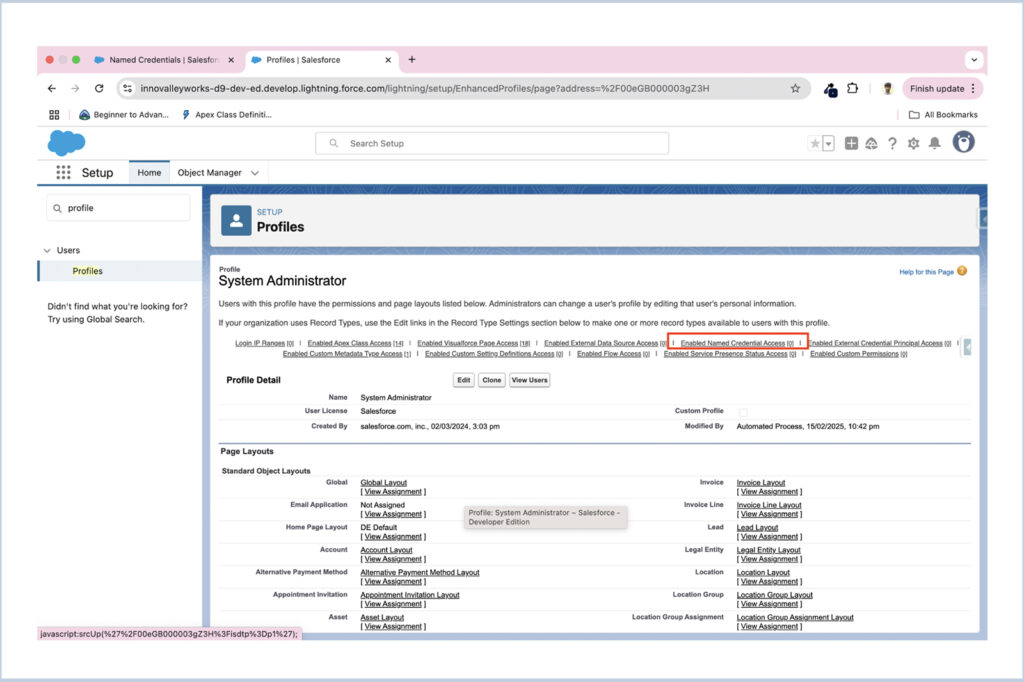
Next, grant the necessary permissions to the External Credential for the specific profile that needs to access it.
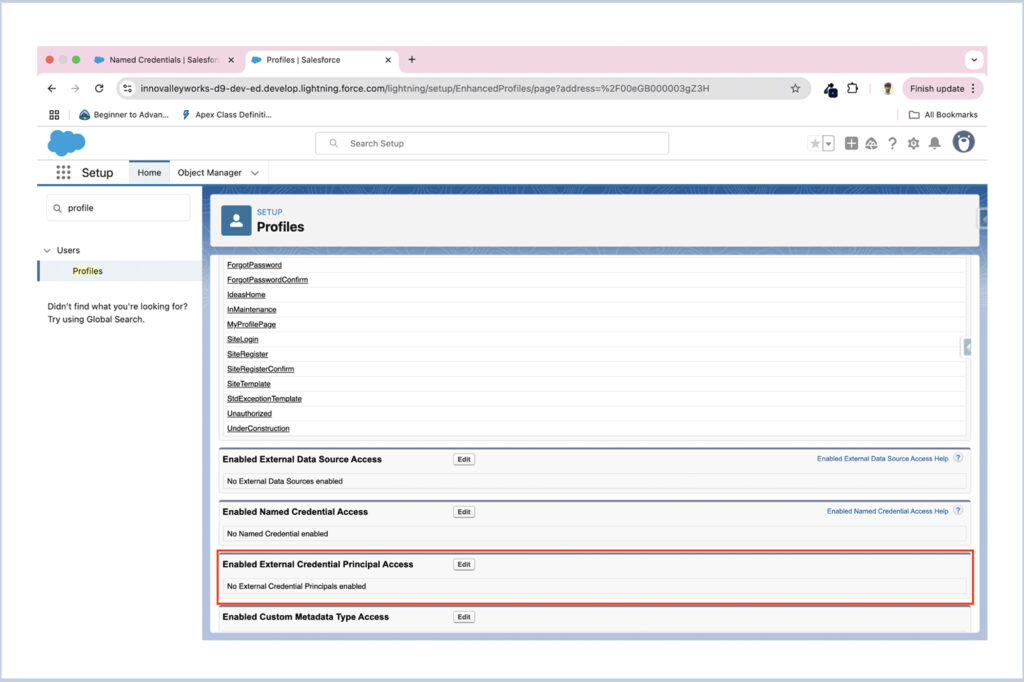
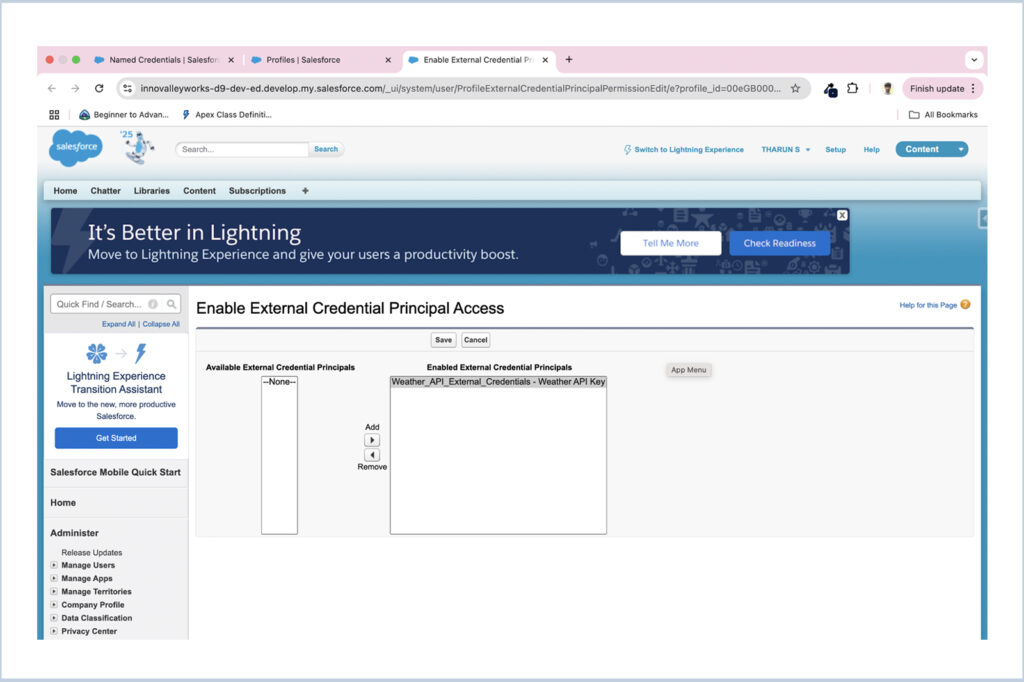
- Navigate to Setup > Profiles, and select the profile that requires access.
- Within the profile settings, find and open the Enabled Named Credential Access section.
- Add the External Credential you created to the list of allowed credentials.
- Save your changes.
With the setup complete, you can now create an Apex class with a method to fetch data from the Weather API. Instead of hardcoding the base URL directly in your Apex code, you can reference the Named Credential. Similarly, the API key or secret is automatically injected into the request headers from the External Credential, ensuring secure and seamless authentication.
APEX CODE :
public class WeatherService {
    public static void getCurrentWeatherDetails(String cityName) {
        HttpRequest request = new HttpRequest();
		request.setEndpoint('Callout:Weather_API_Named_Credential/v1/current.json?q='+cityName);
		request.setMethod('GET');
        Http http = new Http();
		HttpResponse response = http.send(request);
        if(response.getStatusCode() == 200) {
            System.debug('Result from Weather API : '+response.getBody());
        }
        else {
            System.debug('Result from Weather API : '+response.getBody());
            System.debug('API Status Code : '+response.getStatusCode());
        }
    }
}
In this code, the endpoint is referenced directly through the Named Credential, and the API key is securely retrieved and applied from the External Credential linked to it. This approach enhances security by keeping sensitive information out of the code and also makes it easy to update the endpoint URL directly in the Named Credential, without requiring changes to the Apex code.
We are Inno Valley Works, We are a passionate team of developers, best thinkers and consultants who can solve anything and everything.
With our highly engaging team, you can easily bring the vision to all your business ventures come true.
We have team, put your problem, get your solution
🎥 Check Out Our YouTube Channel
Explore helpful tutorials, product updates, and feature walkthroughs from the team at Innovalley Works.
👉 Visit Our Channel